TrueNAS Portainer
Community Contributed
This guide was contributed by the community and is neither officially supported, nor updated or tested.
Tandoor 2 Compatibility
This guide has not been verified/tested for Tandoor 2, which now integrates a nginx service inside the default docker container and exposes its service on port 80 instead of 8080.
This guide is to assist those installing Tandoor Recipes on Truenas Core using Docker and or Portainer
Docker install instructions adapted from PhasedLogix IT Services's guide. Portainer install instructions adopted from the Portainer Official Documentation. Tandoor installation on Portainer provided by users Szeraax and TransatlanticFoe on Discord (Thank you two!)
Instructions
Basic guide to setup Docker and Portainer TrueNAS Core.
1. Login to TrueNAS through your browser
- Go to the Virtual Machines Menu 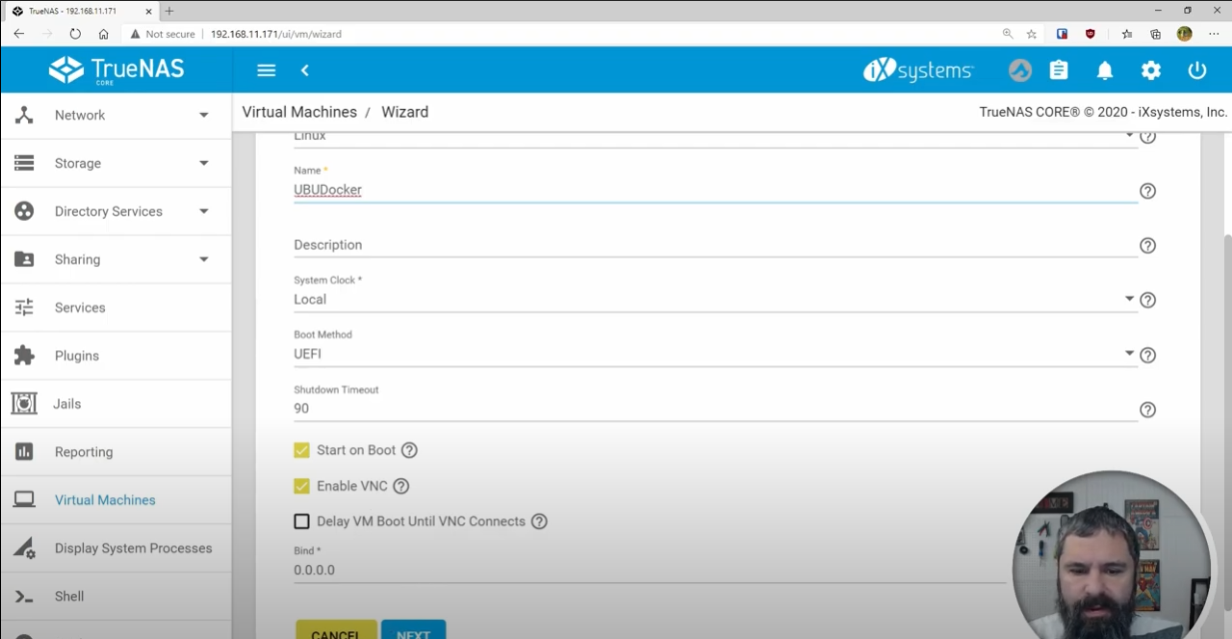
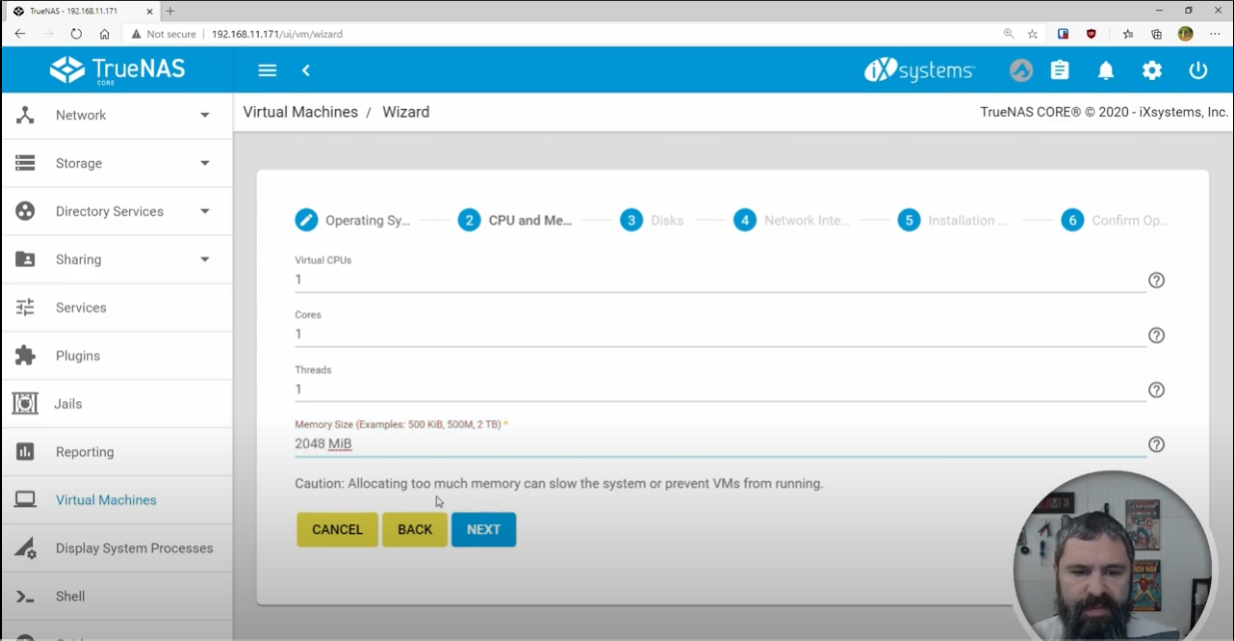
- Click next to dedicate resources to the VM (see below image of authors setup, you may need to change resources to fit your needs)
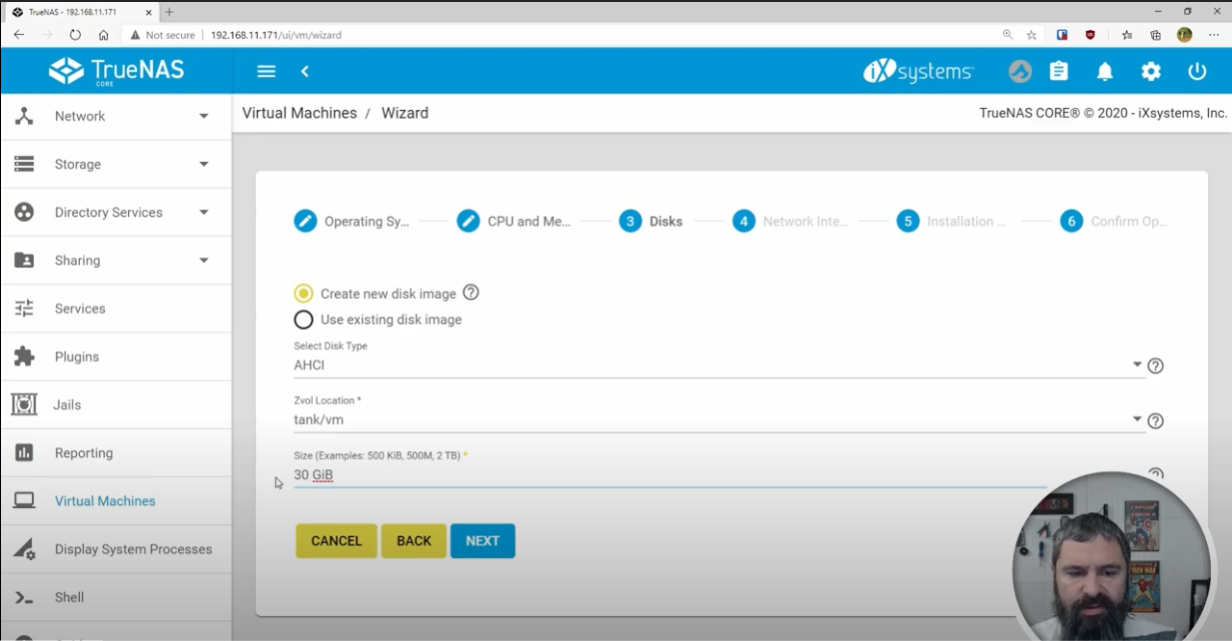
- Hit next to go to disk setup
-You want to create a new disk, here are the settings you should use
-Disk Type: AHCI
-Zvol location: tank/vm (Or wherever you have your VM memory located at)
-Size: Atleast 30 gigs
 -Hit next to go to network interface (The defaults are fine but make sure you select the right network adapter)
-Hit next to go to installation
-Navigate to your ubuntu ISO file (The original author and this author used Ubuntu Server. This OS uses less resources than some other OS's and can be ran Headless with either VNC or SSH access. You can use other OS's, but this guide was written with Ubuntu Server)
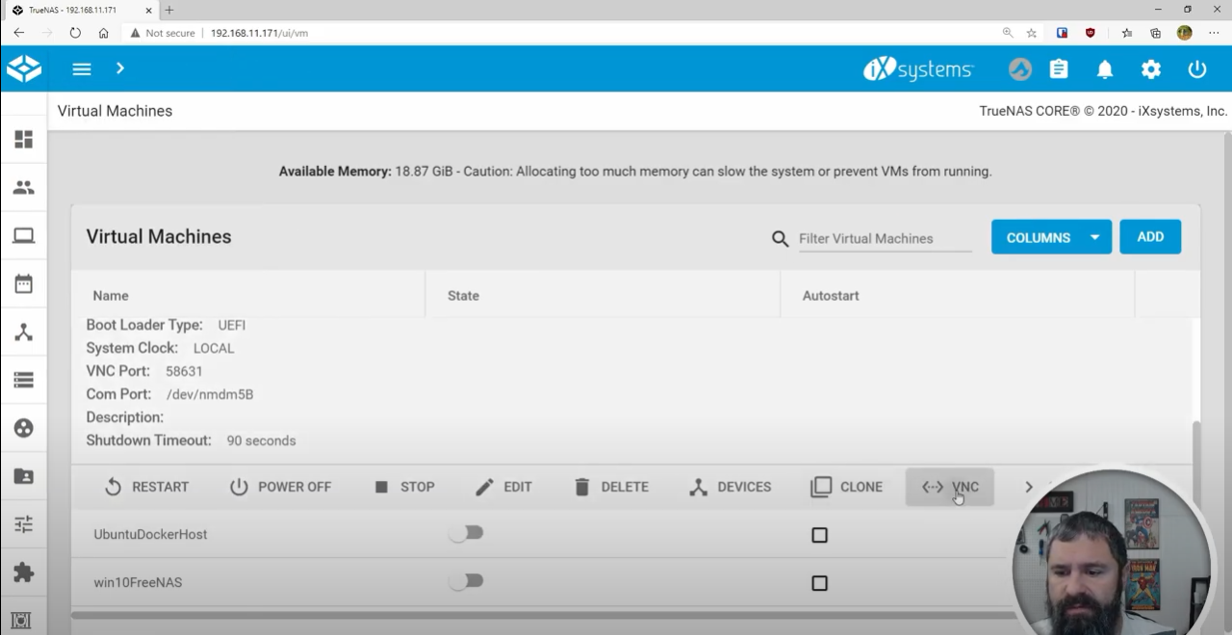
-Hit next, then submit, you have made the virtual machine!
-Open the virtual machine then hit VNC to open ubuntu
-Hit next to go to network interface (The defaults are fine but make sure you select the right network adapter)
-Hit next to go to installation
-Navigate to your ubuntu ISO file (The original author and this author used Ubuntu Server. This OS uses less resources than some other OS's and can be ran Headless with either VNC or SSH access. You can use other OS's, but this guide was written with Ubuntu Server)
-Hit next, then submit, you have made the virtual machine!
-Open the virtual machine then hit VNC to open ubuntu
 -Once its up choose your language and go through the installer
-Once you are done with the setup we want to SSH into the ubuntu VM to setup docker
-Open powershell and type SSH "user"@(ip) (replace "user" with the user you setup in the OS installation)
-Enter your Password if requested
-Close the VNC Console
-Go back into the SSH console and get ready to type some commands. Type these commands in order:
-Once its up choose your language and go through the installer
-Once you are done with the setup we want to SSH into the ubuntu VM to setup docker
-Open powershell and type SSH "user"@(ip) (replace "user" with the user you setup in the OS installation)
-Enter your Password if requested
-Close the VNC Console
-Go back into the SSH console and get ready to type some commands. Type these commands in order:
sudo apt updatesudo apt install apt-transport-https ca-certificates curl software-properties-commony(If prompted with a question)curl -fsSL https://download.docker.com/linux/ubuntu/gpg | sudo apt-key add -sudo add-apt-repository "deb [arch=amd64] https://download.docker.com/linux/ubuntu focal stable"sudo apt updateapt-cache policy docker-ce-To make it so you don’t have to use sudo for every docker command run this commandsudo usermod -aG docker ${USER}su - ${USER}
2. Install Portainer
!!! Note: By default, Portainer Server will expose the UI over port 9443 and expose a TCP tunnel server over port 8000. The latter is optional and is only required if you plan to use the Edge compute features with Edge agents.
-First, create the volume that Portainer Server will use to store its database:
docker volume create portainer_data
-Then, download and install the Portainer Server container:
docker run -d -p 8000:8000 -p 9443:9443 --name portainer --restart=always -v /var/run/docker.sock:/var/run/docker.sock -v portainer_data:/data portainer/portainer-ce:latest
-Portainer Server has now been installed. You can check to see whether the Portainer Server container has started by running docker ps
-Now that the installation is complete, you can log into your Portainer Server instance by opening a web browser and going to:
https://localhost:9443
-Replace localhost with the relevant IP address or FQDN if needed, and adjust the port if you changed it earlier.
-You will be presented with the initial setup page for Portainer Server.
-Create your first user
-Your first user will be an administrator. The username defaults to admin but you can change it if you prefer. The password must be at least 12 characters long and meet the listed password requirements.
-Connect Portainer to your environments.
-Once the admin user has been created, the "Environment Wizard" will automatically launch. The wizard will help get you started with Portainer.
-Select "Get Started" to use the Enviroment Portainer is running in

3. Install Tandoor Recipes VIA Portainer Web Editor
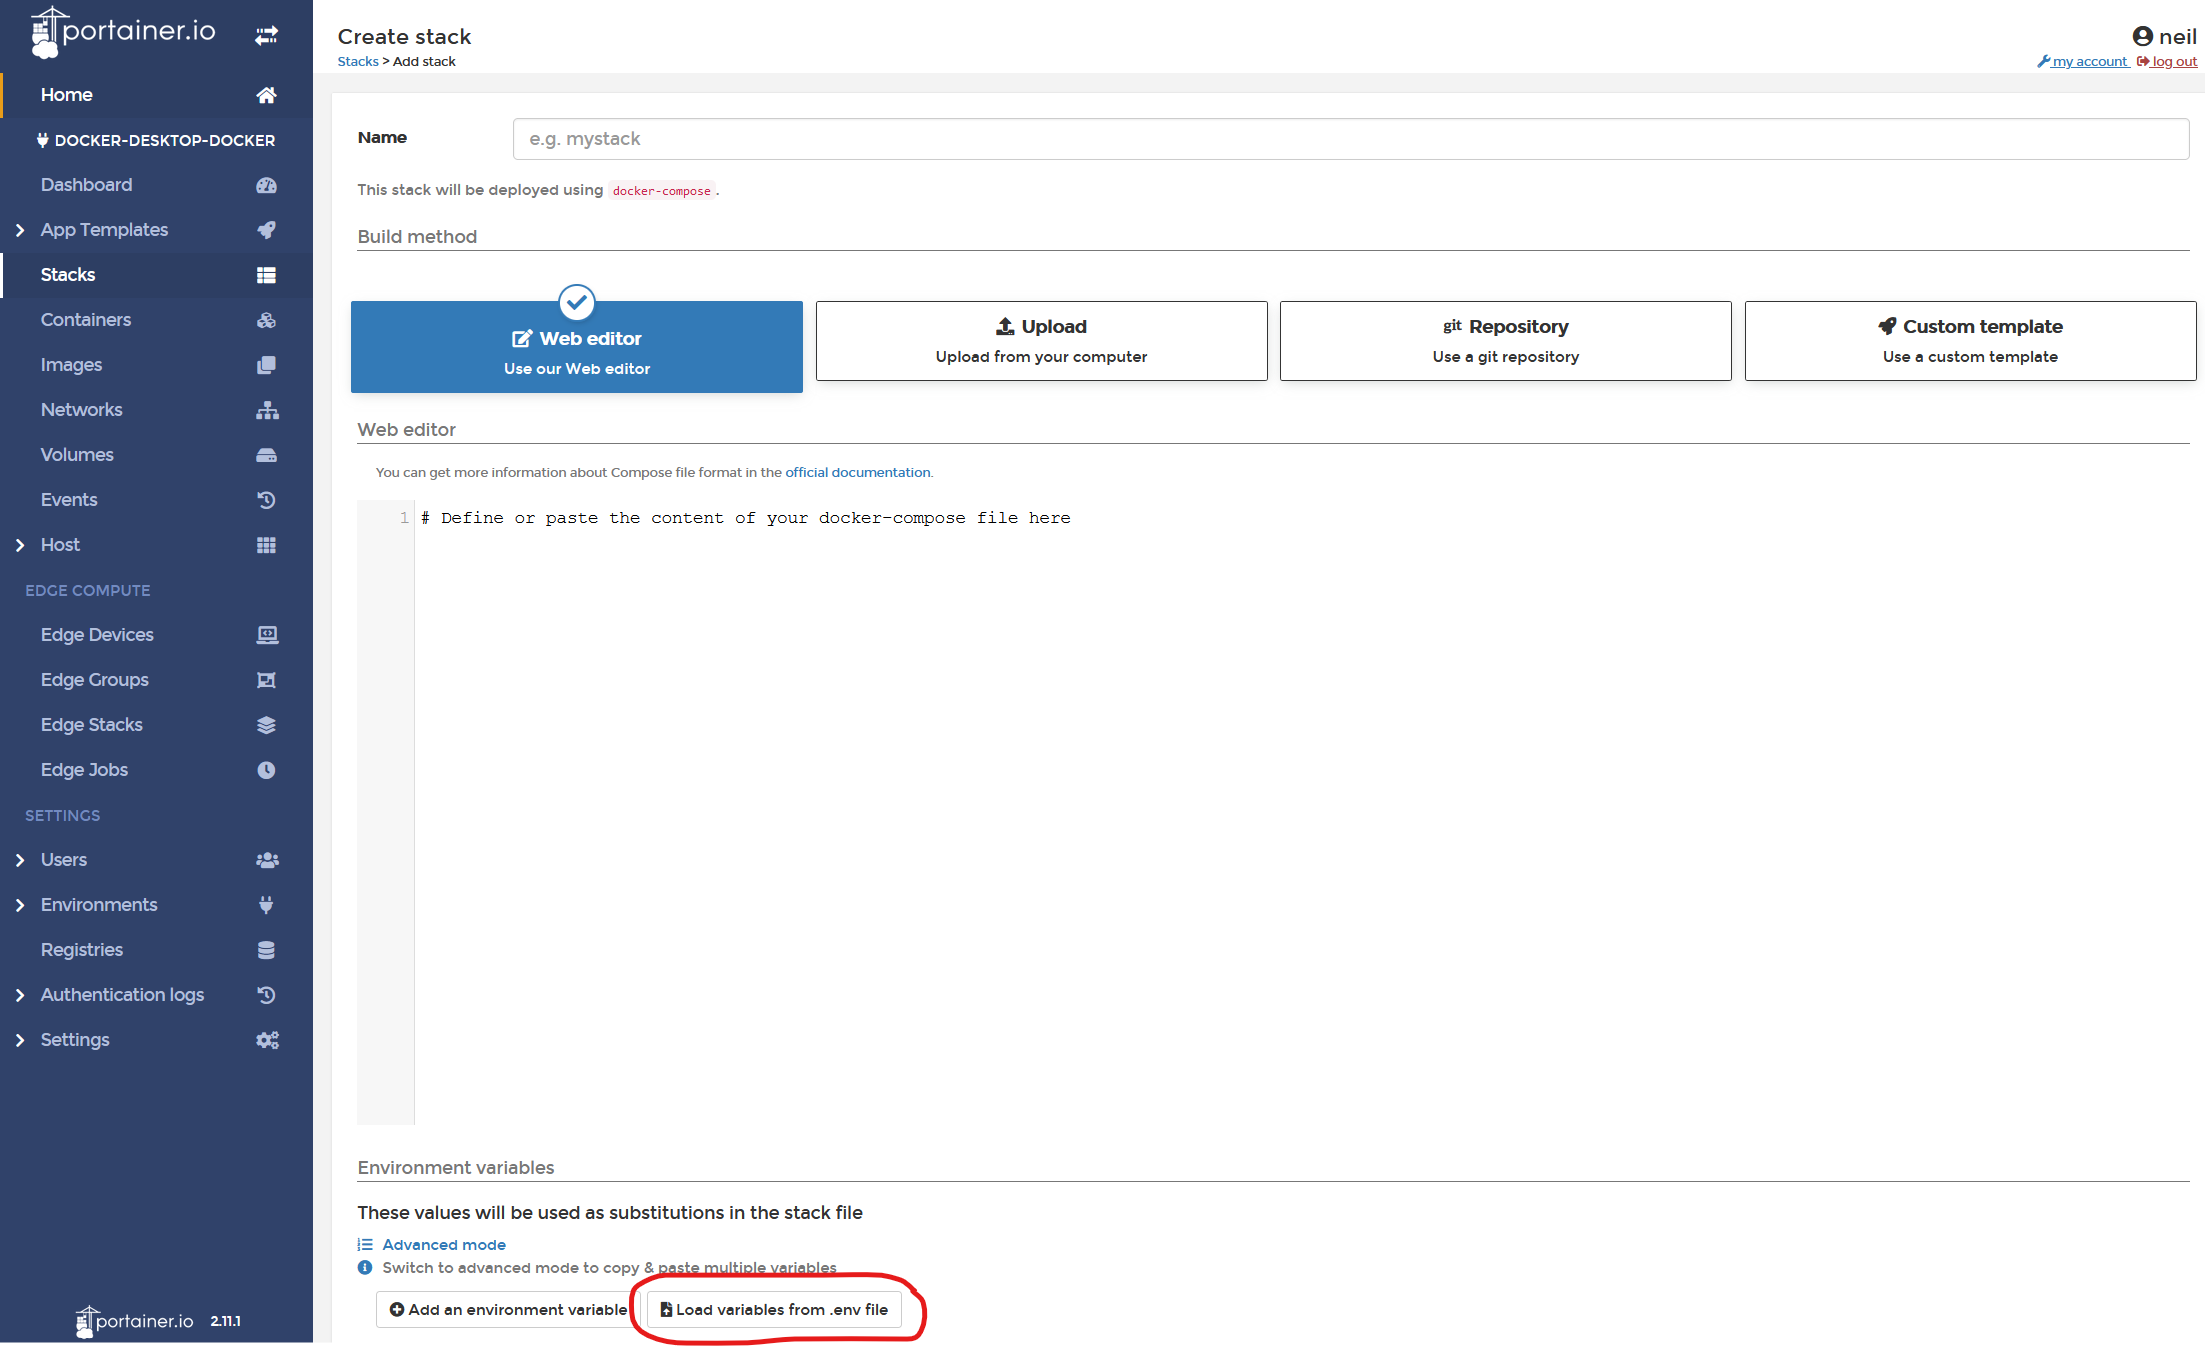
-From the menu select Stacks, click Add stack, give the stack a descriptive name then select Web editor.
 -Use the below code and input it into the Web Editor:
version: "3"
services:
  db_recipes:
    restart: always
    image: postgres:16-alpine
    volumes:
      - ./postgresql:/var/lib/postgresql/data
    env_file:
      - stack.env

  web_recipes:
    image: vabene1111/recipes:latest
    env_file:
      - stack.env
    volumes:
      - staticfiles:/opt/recipes/staticfiles
      # Do not make this a bind mount, see https://docs.tandoor.dev/install/docker/#volumes-vs-bind-mounts
      - nginx_config:/opt/recipes/nginx/conf.d
      - ./mediafiles:/opt/recipes/mediafiles
    depends_on:
      - db_recipes

  nginx_recipes:
    image: nginx:mainline-alpine
    restart: always
    ports:
      - 12008:80
    env_file:
      - stack.env
    depends_on:
      - web_recipes
    volumes:
      # Do not make this a bind mount, see https://docs.tandoor.dev/install/docker/#volumes-vs-bind-mounts
      - nginx_config:/etc/nginx/conf.d:ro
      - staticfiles:/static
      - ./mediafiles:/media

volumes:
  nginx_config:
  staticfiles:
-Download the .env template from HERE and load this file by pressing the "Load Variables from .env File" button:
-You will need to change the following variables:
-SECRET_KEY needs to be replaced with a new key. This can be generated from websites like Djecrety
-TIMEZONE needs to be replaced with the appropriate code for your timezone. Accepted values can be found at TimezoneDB
-POSTGRES_USER and POSTGRES_PASSWORD needs to be replaced with your username and password from PostgreSQL !!!NOTE Do not sign in using social media. You need to sign up using Email and Password.
-After those veriables are changed, you may press the Deploy the Stack button at the bottom of the page. This will create the needed containers to run Tandoor Recipes.
4. Login and Setup your new server!
- You need to access your Tandoor Server through its Webpage:
https://localhost:xxxxreplacinglocalhostwith the IP of the VM running Docker andxxxxwith the port you chose in the Web Editor fornginx_recipesabove. In this case,12008. !!! While the containers are starting and doing whatever they need to do, you might still get HTTP errors e.g. 500 or 502. Just be patient and try again in a moment -You will now need to set up the Tandoor Server through the WebGUI.